Save that Old Tech! Fixing Up a Startek 2500 Frequency Counter

One of things I take joy in is finding old tech that is still useful. This impulse isn’t limited to radio gear either. I have a collection of restored forestry tools, mostly axes, I accrued after looking for a decent axe at the local hardware stores and came away wanting.

So, in any event, I recently came across a Startek 2500 frequency counter for sale on eBay. I recall ads for these from around the time I became a ham in the late nineties. At some point the company disappeared. I believe Startek and Optoelectronics may have been the same company as they were both based in Ft. Lauderdale, FL and their designs were rather similar.

For $56, I decided to take a chance and bought the old Startek. I have no idea what these go for but I’ve looked at older frequency counters from other companies that still go for several hundred dollars used. For my purposes, mostly experimentation and field radio, this handheld unit is probably superior to a benchtop model anyhow.

A quick ops check after receiving the Startek proved the unit still worked. I had to power it from an external 12VDC source though as the internal batteries didn’t seem to take a charge. Those old batteries can be a source of grief so after the initial ops check I decided to do a teardown and inspect the internals.

Leaky Nickel Cadmium batteries inside the Startek 2500.

Sure enough, the old nickel cadmium internal batteries were leaking corrosive material and needed to be removed. Removal wasn’t difficult. Probably a 10 minute job. I haven’t decided if I’ll replace them or not. For now, I’m content to run it off one of the many LiFePO4 batteries I have for powering portable equipment.

Testing the Startek 2500 against a 2 meter HT.

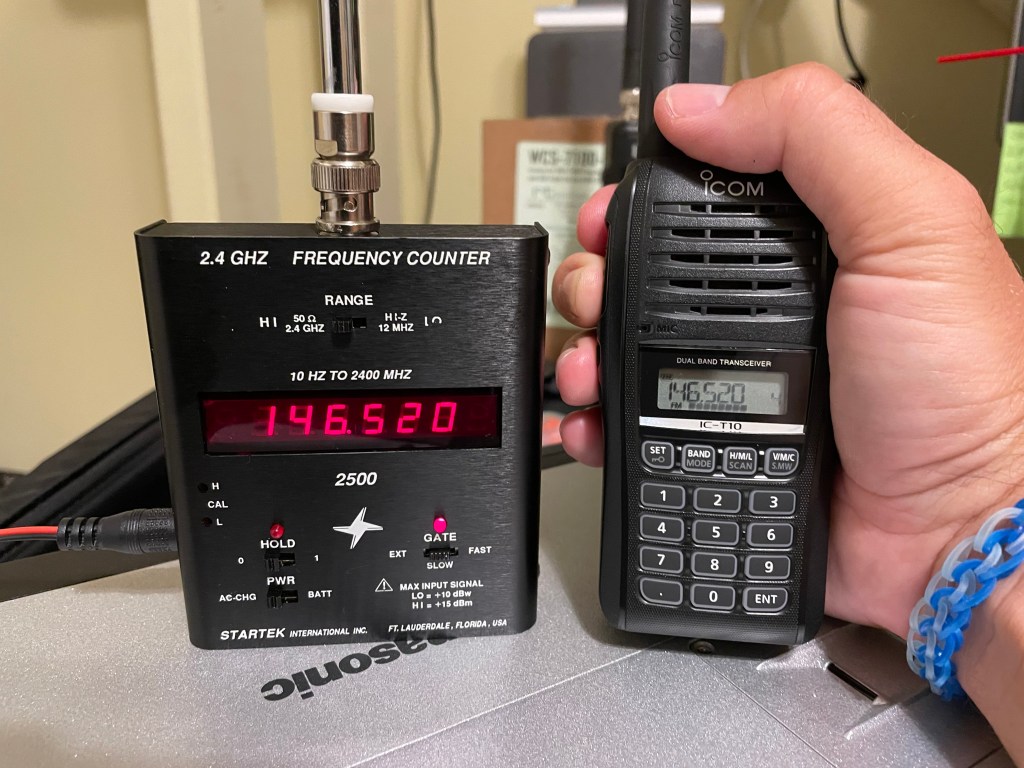
Was it worth the trouble? I think so. The Startek works as well as it ever did and is a solid piece of American made tech. As the photo above shows, it’s remarkably accurate considering this is probably about 20 years old. It might be off a bit on HF frequencies but I need to do more testing to validate one way or another.

Happen to have a manual for this unit? I’d love to get a copy of the documentation for this gadget so if you have a copy please leave a note in the comments.

Padre

Ugly but it Works: MARS/CAP Mod for the Icom IC-T10 HT

I don’t often use HTs but when I do I want two things. First, I want a speaker I can hear. Many rugged HTs are guilty of being difficult or impossible to hear outside of a quiet room (I’m looking at you VX-8DR). The second thing I want is good battery life. I should be able to charge it and put in on the shelf for a while and still have useful life in when I need it (I’m looking at you TH-D74). So when Icom announced the IC-T10 I went ahead and pre-ordered one through HRO.

On the two points above, I have not been disappointed. It has great battery life and rarely needs to be charged. The speaker is plenty loud so can be heard in a moving vehicle or noisy venue. It isn’t the best sounding receiver but it is plenty intelligible. It is a direct conversion receiver with all the baggage that comes with that. Namely, it is easy to desense in a strong RF environment and it is prone to intermod. If you understand those limitations it is a fine, rugged radio that is very usable for analog FM operations.

At the onset, this radio lacked a published MARS/CAP mod. Recent increased attention on bad actors may have the manufacturers thinking twice about offering this option. Worry no more though, the IC-T10 does have an option to expand the TX range to match the RX range of the radio. Since the radio appears to be heavily based on Icom’s Part 90 offerings it makes sense the hardware was capable all along. HRO now offers this mod at time of sale but it’s a whopping $80! We’ll see why as we move along.

I found the mod published at mods.dk. As a hat tip them, I won’t republish their work here but rather encourage you to support their work by signing up for an account. What I will do is validate that their published mod works and provide a few details from my experience.

The mod involves moving a 47K resistor from one pad to another. Easy right? Well, the resistor is a 0402 package SMD resistor. Its about the size of two grains of sand. Gratefully, I’m blessed with excellent near vision and can normally pull off this sort of thing with the naked eye. I was able to remove the resistor but in the process lost it on the workbench somewhere. So I had to order another from Mouser. Since they were pennies a piece I ordered 10.

Since I had to wait anyway I broke down and ordered an inexpensive magnified headset with light on Amazon. Here is the model I ordered. I’m sure most of these are the same but I can say this was entirely sufficient for what I wanted to do and should prove handy in the future.

The 47K resistor that needs to move for this mod is circled in red. This photo was taken with 2x telephoto on my iPhone through the 3.5x lens on my magnified headset. Yes, it is that small.

The photo above shows the resistor in question. The bare pad is where the resistor was initially. You are supposed to move it down to the bottom pad on that trace. You’ll notice that I ended up with a cock-eyed resistor. This was my second attempt on this resistor so I was starting to get nervous about damaging the PCB. I ops checked this and it worked so I left well enough alone at this point and put it back together. Normally, I take a lot of pride in my solder work but I’ll admit I haven’t done very much SMD rework. I’ll certainly look for opportunities to get more practice moving forward.

Here is what I learned working this project. 1) Magnification is good. Even with good eyesight this was too small for me. 2) Clean your contacts well after removing the part so that you can get it to sit flush in its new location. 3) Use an appropriately small tip. Videos showing the technique of wide solder tips across two terminal devices didn’t work for me. 4) Chip Quik no-clean solder flux works great. 5) It wouldn’t hurt to invest in a hot-air rework gun for these jobs. 6) Even after buying a few extras, I came out ahead vice having someone else do this and had the benefit of learning some new skills.

Know your limits but realize if you never push them you’ll never make any progress. It might be ugly but so long as it works, who cares!